shabbyblog

Showing posts with label Spray Paint. Show all posts

Sunday, August 5, 2012

Simple Sixteen Cent Coasters

Yep, you read that right... 16 pennies per coaster (granting you have spray paint and lace already)

Our coasters were pretty dinky. Just your standard Wal-Mart coasters that my parents picked up when we moved in and didn't have any (Don't get me wrong, they served us well for a full year). After making precious little hand print coasters for Father's Day with my class at the preschool (you're welcome dads), I got to thinking. "Hm, that was really easy. Not to mention super cheap. I bet I could come up with something cool to go on the tiles." Thus the wheels started turning. I thought about using my new stamp letters for quotes, painting something, patterns, then it hit me. I love lace. LOVE it. I'd seen where people spray painted through lace with beautiful results, so I googled it, and what do ya know? There it is, the exact same idea in Martha Stewart. 
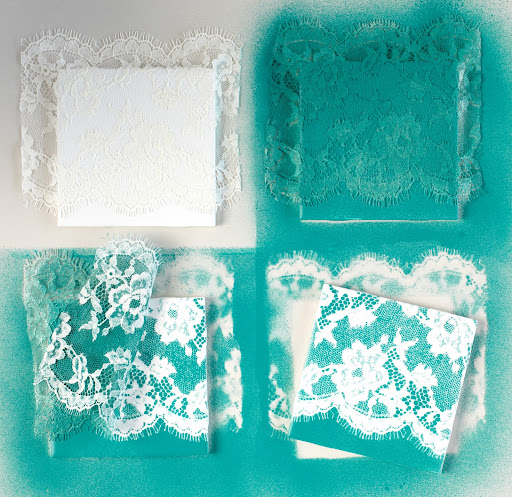

What can I say? Great minds think alike. 

In her tutorial she recommends using a spray adhesive to keep the lace in place while you spray paint. I can see the advantage, but it really isn't necessary. I just laid the lace on top and sprayed through it. It only takes maybe 5 seconds, so my lace didn't move around. A couple times I tucked it under on the side just to be sure. After it dried, I turned it over and sprayed the bottoms as well. Just because. Then I sprayed a clear coat to make them shiny and extra safe from chipping.


I had this metallic silver spray paint from when I spray painted a bright orange lamp to a sleek silver. I'm loving the metallic these days. The lace is from Hobby Lobby a while back. The tiles are in the flooring section of Lowe's or Home Depot and are literally 16 cents a piece. I got six.


This is an example of tucking it in place (And my go-to spray painting protection barrier... aka - an old towel)


Viola! Sleek and chic sixteen cent tile coasters! I'm sure if I had used that spray adhesive, you'd have been able to see more details of the lace, but I really didn't feel like driving back out to Lowe's for one thing...


Okay, let's talk details folks. I believe that true DIY crafts are all about the little something-extras you add to personalize it or make it unique. Taking inspiration from several sources and meshing them together.

I used the aforementioned letter stamps to add our monogram to the back. Fits perfectly. 
I also added those little self-adhesive cork pads, which also fit perfectly in the squares (They are actually cupboard door stoppers and were about $2.50 for 32. Don't quote me on that)

What I love most is the coral accents on the edges. It adds just the right amount of interest. I had them sitting around for a couple weeks before I added the coral, and let me just say, it made all the difference. Before, they just didn't feel complete. Now they feel neat and colorful. 

Ahhh! I spy a baby booty!

I was inspired by Madigan Made's neon edged trivets. Also a very neat idea.
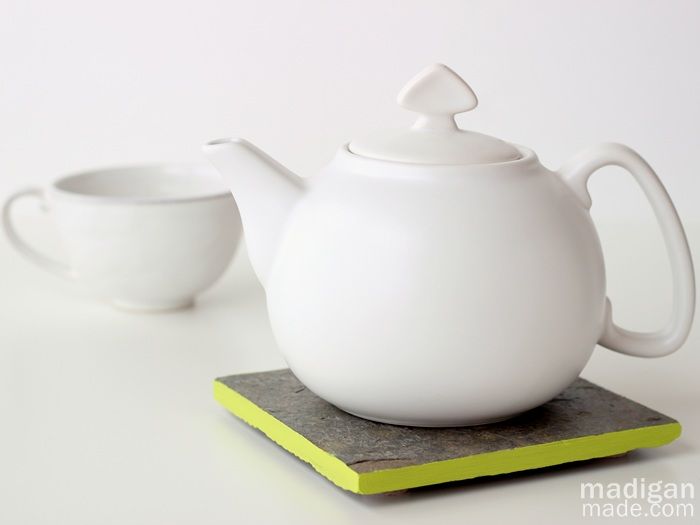

I didn't have any coral on hand, so I mixed some red and orange with a fleshy peach paint to get a lovely shade of coral. It's more orangey and less pinky in real life. And less neony.


Don't you just love that stack of vintage LIFE magazines? We bought several from 8th Avenue Antiques here in Nashville. They are from the 60's, and the one on top is my favorite! It's all about prizewinning pictures from that year. There is also one about the moon landing! One day I hope to be able to display them more properly, maybe in the office.  Someday.

Follow me on Pinterest @halesnoels

Stay tuned!
Haley

Monday, August 29, 2011

DIY Mantle: Warming up the Naked Fireplace

Sorry for the lag, guys. I got a little caught up between a weekend at home and a weekend of pure fun and relaxation (and a week in between).
 Quite a few changes have occurred between our playground adventure and now. 

The biggest change is our new mantle. It has added such a sense of homey-ness to our little old apartment! 

For some reason, the fireplace in our apartment (big selling point for us, btw) is just on a blank wall. It has a nice white frame and painted black insides, but it just exists. Which is a crying shame considering it is such a nice feature, and it is on one of the huge vaulted-ceiling walls. It just felt.... naked

(This is the only picture I have of the wall pre-mantle. I guess it was shy because it was so naked)

And here is how we did it. 
-We bought a length of 1x6 from Lowe's (And they cut it to size for us, of course)
-and 2 decorative L-brackets.
-We already had stain from the coffee table project

Here are my raw materials 
(On our new balcony furniture, but we will get to that in another post)

We intentionally got a board that had lots of knots and "character" to it.
But as straight as we could find. Lots of jokes were made.


This time I used an old towel instead of a paintbrush. It was equally as messy. But I work at a preschool so I am totally over caring about messes. Wood stain on my hands is much less of a concern after snot and poop.


I love the color that it turned out to be! More than the coffee table, really. I didn't use the ebony undertone.
And I stained the L-brackets. (No pictures. Just use your imagination)

Here it is again "Before" with all sorts of project materials in the way of what could be a beautiful fireplace.

I made Josh hold this at a dozen different heights. 
In the end, about 3 inches above the fireplace frame was the location that won our hearts.

The brackets have a receiver built in, so all we did was unsuccessfully look for the studs and drive in a screw. We then decided to include an anchor and felt much better about the life expectancy of whatever ends up living on the mantle. (So it wouldn't fall)

So it looked like this for a few days. 
You know how patient I am?... well the stain wasn't even dry at this point. But I was so anxious to get it on the wall that I just covered the edge that touched the wall in painters tape. Worked like a charm, by the way. 
Remember that big ole frame? Yeah... We had plans for that. More on that later.

Now for a detail pic:

See the swirly L-bracket?! So purty.
 Budget Breakdown:

Lumber: 1x6.........$7.00
2 L-Brackets.......$12.74
Stain.......................Free
Total..................~$20.00

And what became of that frame? Well, I'll show you!
We spray painted it (The pictures above were already sporting a cream colored spray paint. But I wasn't diggin' it.)
We moved on to a light blue (A nice accent for our very tan-brown-cream living room)
It was looking awfully "Baby Boy"ish, so I made sure to distress it lots with our handy dandy orbital sander. Better. 
Then we wrapped the whole thing in chicken wire.


I'm really lacking on pictures of this process, but basically we 
  1. rolled out some chicken wire, 
  2. used all-purposed snips to snip a line we thought was approximately the correct length, 
  3. put the frame face down
  4. (carefully) wrapped the wire around the edge (pulled it tight)
  5. and staple-gunned it on the back
Except we under-estimated a tad on the length, so on one side it didn't reach the back. We just decided that would be the top and no one would see it anyway. Except you. No big.


And here is the front: (bad lighting for all these... I apologize)


Before


After! Nice and level... YAY!
So now to decorate that behemoth sucker.
I have a feeling it will have many different faces throughout its life above my mantle.
Here is the birth of the first one.


Anyone remember these?! I made these moss letters for our wedding. 
Here is proof:


So I removed the orange ribbon and added lace in its place.

Naked mantle

All situated. 

Left details

Right details (I love my felt birdie)

 Josh picture of details

A very fulfilled couple.
(oh, and this was all after we took a hike through Percy Warner Park...)

So we are allll ready for autumn to roll back around so we can utilize our now-beautiful fireplace. And Christmas so we can finally hang stockings!

A couple other changes that deserve a nod are our new lamp shades from Target


Once we (I) saw these, we (I) was hooked. We (Josh) promptly returned the plain jane ivory shades to Lowe's and we fell in love with these burlap drum shades.

And the ladder found a home!

I'm still open to ideas on how to spruce it up. Please comment below if you can think of something!

There are a couple more projects to fill you in on, but that will have to wait for another day.

Stay tuned!
Haley