shabbyblog

Tuesday, August 2, 2011

New Job Discretionary Tale

As some of you may know, I started a new job this week in my new city. I am officially a preschool teacher! Because of the nature of my job, I want to be sure to protect the kids and my school and respect their privacy. However, I will keep you updated on cute little anonymous anecdotes from the day and lessons I've learned from my job and the kids (since we all know that children unintentionally teach you almost as much as you teach them). 

For example: My preschools taught me today that I rely on auto-correct and spell check entirely too much. I got super paranoid about dictating how to spell words for them to write down on paper that their parents will see. {a writing activity: "my favorite move is..."

As in... all flustered and I second guess myself on how to spell words I KNOW how to spell like "despicable"... and a huge inner-dialogue of self-deprication and English phonetic rules run through my head in a matter of me saying "Your favorite movie is Despicable Me? That's a long word. I'll help you spell that"

I'm really thinking. "Seriously kid? Despicable Me? You couldn't have been like your friend Johnny and pick Toy Story? Let's see. D-I-S-picible? No... D-E-spicable. No. D-E-S? Yeah I think so. Visualize the movie. See the poster in your head. It ends in A-BLE. If I could just discretely grab my phone and let it auto-correct me to be positive. Oh my gosh, Haley. You are a college graduate. Don't let this preschooler intimidate you. Get it together!" 

On the flip side. My job can also be one of the most rewarding jobs on the planet. Shaping these little humans to be kind and honest is our goal. We get to love on them and see their tiny faces light up when we tell them they are doing a good job or that picture they drew is beautiful.
And that kids are pretty darn cute when they are napping.
That's all for now folks. Stay tuned!

Monday, August 1, 2011

Pallet Coffee Table Tutorial

If you are a Pinterest advocate, you may have noticed that repurposing wooden pallets is all the rage in DIY-Land. Well I jumped aboard that bandwagon. The pallet-style coffee tables I had seen had all utilized rather large pallets that would probably take up all walking space in our little apartment. So when Josh found these three little guys behind a Mexican restaurant and brought them home as a "surprise," my mind started racing. I wanted to take what I had seen and make some adjustments. (side note: you know you are deep within DIY-Land when Husband brings home Mexican-restaurant-trash and you get all giddy)

Remember the pallets we stacked as a coffee table?


Pretty snazzy, huh?

Well I had bigger dreams for this guy. Dreams of rich stain, storage, and legs. I'm here to tell you dreams do come true! (Well, 2 out of 3 in this case) Introducing Sorta-Finished-"Special"-Walnut-Coffee-Table!


Mmmmm... Chocolate-y goodness... well really walnut-y.

Staining the three pallets was easy enough, though incredibly time-consuming. I definitely would have done things a little differently, and I'll give those tips at the end. 

First, gather your supplies.


Enter: our new orbital sander DeWalt. We got this guys for $60 (no big sale or awesome deal to brag about, unfortunately), but we figured we were going to be needing a good sander for many future adventures in DIY-Land, so we may as well bite the bullet. We also got Medium and Fine grit pads.

Also included in the toolbelt:
  • container of water (something disposable), 
  • rag (or 2), 
  • old paint brush (or 2), 
  • stain of choice (in this case: Minwax Ebony & Special Walnut)
  • tarp (if you happen to have to do all this on a 3rd {though really 4th} floor patio)
So obviously you sand the wood first. I was really nervous/anxious throughout most of the sanding process because I was just waiting for any of our neighbors to shake an angry fist at me, and therefore kept checking over my shoulder and down through the slats of the balcony as if I were expecting the KGB to show up. 


Luckily they did not. And after a while, I relaxed. I was so happy to find that this sander sucks in the dust and traps it for you. I mean, like, really efficiently. I was pretty worried the neighbors below us would come home to find all their patio furniture covered in... sander-dust? All in all... I was nervous about our first project in an apartment complex.


The wood was already raw, so I was just removing the grime and smoothing it out. I also dulled the edges in case any shins accidentally found them in the dark... or little nephews. This is a plank half-way through the sanding. Can you see the difference from the dark-grime to the light-ungrime? 

Well I can.

(Side note: I had to hand-sand the inside spaces, which resulted in a pretty nasty splinter, thus half-heartedly sanding the rest of those untouched-by-power-tools areas.) 

So once all three pallets were sanded, top and bottom and edges of each plank, mind you, staining begins. I used a technique that Sherry from Young House Love demonstrated in this tutorial. The irony? They used this technique because they wanted their new wood to look like old pallets. We already had the pallets in great condition, but I wanted more color from them. In the end, they don't look very "weathered"... just dark. 

Anyway. This is how it went down.


First you use a brush to wet the wood. This way it doesn't absorb a ton of the ebony stain. It is best to go one plank at a time. Don't get overly-abitious or the water will soak in before you get a chance to stain.


Then you brush on ample amounts of the ebony stain. Be prepared for dripping and splattering. I looked like I had some strange skin disease by the end of it all. 


Use a rag to wipe off the excess. It is up to you how much stain the wood takes in based on how much water you "pre-soak" with and how long you let the ebony stain sit. I sometimes did two ebony passes if I wasn't satisfied with the texture I got. 


(Forgive my pasty legs and socked feet- the tarp was really hot and the socks buffered the heat)
Don't forget to get on the "inside" spaces, edges, and ends. I usually did something like this to easily access the hard-to-reach areas (aka-Splinterville or Untouched-By-Power-Tools-Land)


Here is an example of the difference.


And here is an entire-pallet before and after. Honestly, you could leave it at that. Maybe add some poly to make sure it is all sealed and call it a day. But not this gal.


I moved on to add Minwax Special Walnut stain. I experimented a bit with the middle pallet to see how dark it would turn out and if there were any tricks I wanted to try. I tried the same technique as the Ebony (water first, stain, wipe),  but honestly, it had little effect because the Ebony stain was already working, thus repelling the water. So I gave up on any special antics and just directly brushed it on. Sometimes I would wipe off the excess, but that was mostly due to impatience. 


(Again, excuse the pasty leg)
See the difference? Pretty noticeable this time, eh?
So then you just wait for the stain to dry (cause for one thing, it's pretty stinky)

Here are some pics of why the pallet that is on top is my favorite. It has some pretty spectacular details if you look hard enough.

 
Knots and Print

Cool waffle texture

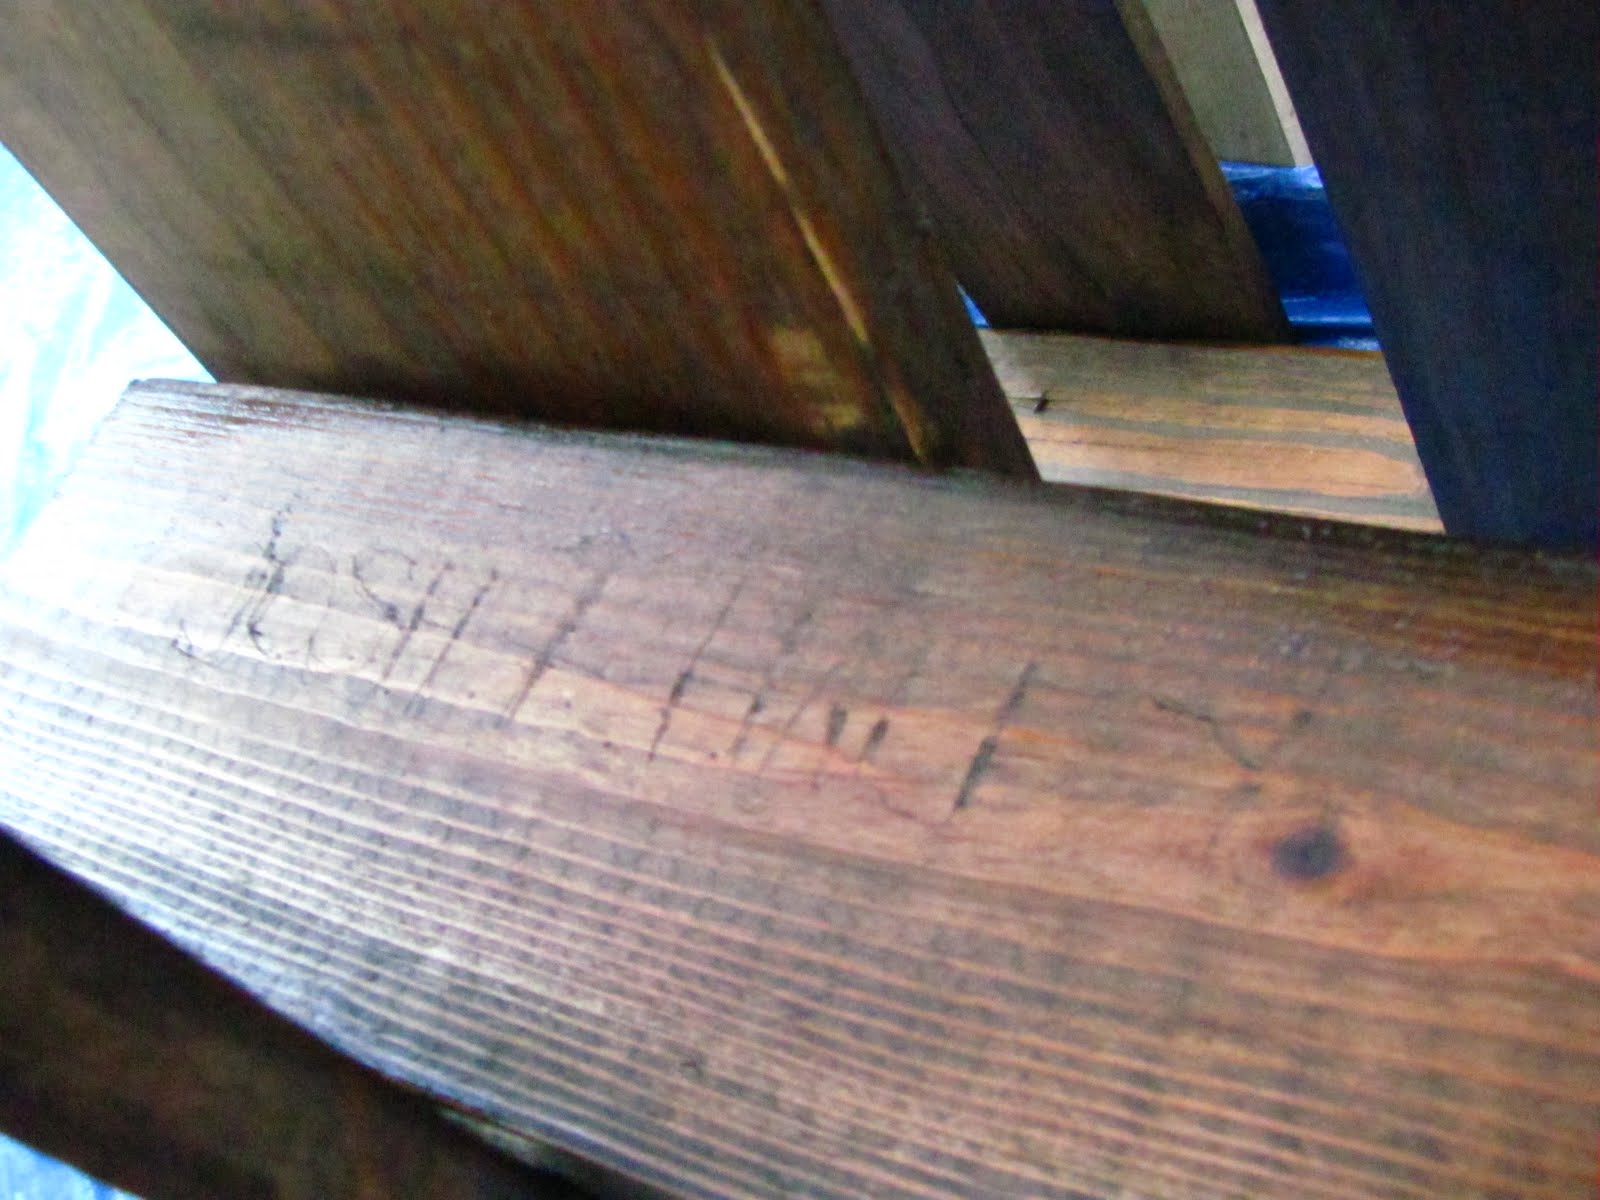
Did ya catch that one? I caved "Josh + Haley" into one of the beams. You can barely tell... but it makes me very happy. Disproportionately happy. Because I know it's there. 

Oh, and while Josh was out getting groceries and such, I asked him to stop by Lowes and get legs. After much picture messaging back and forth to show me all my options (I probably should have just gone with him), he came home with these:


The shape vaguely matches that of the legs of the couch and chair. Since they are a different type of wood, I knew the stain would look different. But I made peace with that fact quickly because they were going to be in the shadows of the coffee table anyway. 


So I painted a sloppy coat of Ebony (no water coat this time) and wiped it off.
Then coated them in the Special Walnut.
(No picture of all 4 fully-stained, sorry. But you get the idea, right?)


So that was about all I could do that day (Friday) until it all dried. 
I noted how much more of the Walnut (left) I used than the Ebony (right). 
In case you cant tell, I used probably 2/3 of the Walnut and maybe 1/3 of the Ebony.

I was a little worried about leaving them outside overnight because 1.) The stain is pretty sticky until it dries and stuff might stick in it, and 2.) it had sprinkled earlier and I was paranoid it might rain overnight.

So we brought them inside and made a little teepee of pallets in the living room (on a tarp so it wouldn't stain the rug) and put a fan on it.

Boy am I glad I did that. It POURED Friday night. 

I'm pretty proud that I resisted the urge to mess with them before they were dry. I'm not one for patience. But luckily we were well-occupied Saturday around Nashville, so I wasn't even at home to think about it. When we got home that evening, we got back to work.


Installing the legs was very easy. They already has little screws sticking out of the top, so we just placed them were we wanted them (about an inch from the edges), pushed them into the wood so the screw would make an indentation, then Josh drilled a little hole where the marking was, and screwed in the legs.


And just like that, our coffee table had appendages.


So we removed the tarp and stacked the newly-stained-still-a-little-sticky pallets and viola. 


The plan is to cut out part of the boards from the next-to-bottom shelves to create little cubbies, insert baskets, and instantly have storage.  Hard to explain, I'm sorry. I'll just have to show you whenever we get about to actually doing it. First we must retrieve Josh's Skil saw from Hattiesburg. Oops. 

Lessons Learned:
  1. I would recommend using a separate brush for the water. The two stains were fine for the same brush, but the stain left in the brush when I used water affected the outcome of the ebony stain. And it ruined the tupperware container that I used for the water because so much stain settled in (and I even washed it out a couple times in the process). A separate brush might have prevented this.
  2. Gloves wouldn't hurt, especially in the sanding process. 
  3. Do all this in a well ventilated area, especially the stain. And read the cautions on the stain.
  4. Be prepared for splatter, spills, and other stain-related tragedies (i.e. don't paint/stain close to walls, directly on any flooring you value at all, in any clothes you aren't willing to throw out... or designate as painting clothes)
  5. Allow yourself plenty of time (It took me about 6 hours for the whole sanding/staining process)
  6. You might want to try completing one side or pallet then moving on. Meaning do both stains in one sitting. I went through all three pallets with the water/ebony process, then went through all three again with the walnut. It was daunting to have to do it all over again. 
  7. Double or triple check that you got to every nook and cranny, edge, corner, and knot.
  8. We haven't poly'ed yet, but we plan to. This will ensure a protective layer from condensation-cups and the like.
  9. Take breaks or your neck/back will kill you the next day (speaking from experience). I sat down and basically worked straight through with maybe 2 five-minute breaks. What can I say? I get in the zone.
Budget breakdown:

Pallets (3)...............Free
Ebony Stain..........$7.50
Walnut Stain.........$7.50
Brush....................$1.50
Legs (4)..............$28.00
Total...................$44.50

(Not including the sander because it was something we were planning to get anyway, and it will be used many more times)
I admit, the legs are a little, um, ridiculous, but have I mentioned I'm a bit impatient when it comes to my projects? I just really wanted some pre-made easy-to-install legs. I probably could have FOUND something to used as legs had I waited. But all in all, a coffee table under $50 is a nice deal. 

Check out these other ideas and subscribe to their blogs!

My friend Holley recently posted this uber-cute repurposed pallet shelf! I've been crushing on it, and even considered sacrificing one of my pallets for this purpose, but I was already so committed to my coffee table.


Or check out this post from Blue Velvet Chair that has several ideas for pallet freecycling. Some of them, though fantastic, are way out of my skill set. Others are a "someday" project. Perhaps when we have more room. 


and


Have you seen any other repurposed pallet projects you love? Any plans to use pallets around your own house? 

Stay Tuned, Folks
Haley


Tuesday, July 26, 2011

Nashville Nesting

So when will my posts stop rambling on and on about the move to Nashville? Well probably when it finally hits me that I'm a Tennessee resident. A metropolitan dweller. An urban girl, if you will. I have been living here for a week and a half and it still hasn't quite set in that I won't be "going home"... this is my home now.

Get ready Nashville!

Well really more like this:

This is really a view from our apartment! We live in the foothills slightly west of the downtown area, but believe you me, we are still in Nashville. This post is dedicated to a few more views from inside the apartment. I'm not ready to give the whole tour, yet.


Above is my little backsplash project. Instead of hanging each cookie cutter letter individually (thus more holes in the wall), I just hot-glued them to a cutting board. I like that it is all cut up and worn. You can't really tell from the picture, but there is an "M" monogram engraved on the board. Below it are my new(ish) salt and pepper shakers and my chicken/rooster kitchen timer from Everyday Gourmet in Jackson. (I really really wish it would cock-a-doodle-doo instead of ding! or at least bock) I found the shakers at Harpeth Antique Mall near Franklin. They match my wedding china really well... talk about luck. The twine marks the salt because I can never remember which is in which shaker and they look exactly the same, so I always ended up smelling the little holes or pouring a little into my hand. It got old.  A little bow of twine and problem solved.

Here is what the backsplash looked like in Hattiesburg:

Here is our coffee table project:

Josh picked these skinny pallets up behind a Mexican restaurant in Hattiesburg about a week before we moved after I had showed him this project.
 Our plan is to sand it (we just bought an orbital sander -yay new toys!), stain it using the method Sherry from Young House Love demonstrated here to bring out the grain and texture. The middle pallet will be removed and cut up to make separators so there is some storage. Add some little legs to lift it off the floor slightly and BAM... one sexy repurposed coffee table. 

Next we have our plate display:

This hangs above the brand new couch. I made that mirror with my mom and Sis several years ago out of an old window pane they found somewhere. I'm going to sand it down some to make it show it's age (at the time we made it, I didn't like the "aged" look... I was like 14, don't judge) The plates belonged to Josh's great-grandmother, Mamaw Creel. The bird plates are mine from Pier One. They show up elsewhere in the house also.

Here is a close up of the sweet yellow flowers:

Here is a pic of the plate display "in progress." I probably rearranged them a dozen times (notice the yellow one on top that didn't make the cut?). I wanted it to focus more on Mamaw's plates. What spawned the idea was that I wanted to display them since they are so special to us, but we were low on dining room space. And it hit me. Hadn't even thought about it before that moment. I was so set on having a buffet and hutch.

 But the real reason for the following pic is because you can see our beautiful new sofa! We are so proud of it. 

It may not look like much, but it is deep and comfy as if it were made from down [as in goose feathers. semantically weird sentence, sorry],  sleek, clean lines, and once we get some cooler throw pillows (Maybe a soft blue? Buttons will probably be involved. Or lace. I'm on a lace kick), it will change the whole mood of the room. The in-yo-face green isn't really vibe-ing with the subdued color scheme.

We ended up having a very cream/yellow/green color scheme in the living room and I'm digging it. Here is a pic my rosebud end table lamp:

I found these beauts (I have two) at Cracker Barrel of all places. I had a hankering for mashed potatoes one day, and it seemed my options were Cracker Barrel or KFC, so we went to CB. What d'ya know, that little store actually had some really neat home decor items in an "all-white" display area {sounds racist}. I genuinely freaked out when I saw it. They only had one and I really wanted a matching pair so my sweet adoring husband asked if there were any more in the store and there was one more! Hidden in the back those sneaky b-words. Hooray.  They will be getting a shade upgrade. Maybe a linen or burlap drum shade?

Here are is a little serves-no-purpose-other-than-to-look-pretty action:

I picked these crates up at Magnolia Flea Market on Highway 49. I've been eyeing wooden crates at flea markets for ages waiting for my perfect opportunity to pounce. They run anywhere from $25-50 each but I got these guys 50% off. Meaning both of them for 25! 
Displayed are... ('cause I know you care)
  • {Starting from the bottom}: a basket with a ceramic birdie from Marshalls or Ross (it looks like a nest... get it? tee-hee), a couple of small glass bottles I've had for so long I couldn't tell you where they are from, a tall candle I got at Hobby Lobby on sale a long time ago, all on a yellow and while place mat from Target. 
  • {On top of the crate}: on the corner by the fireplace is our Willowtree wedding cake topper. 
  • {In the top crate} are three blue glass jar (also been eyeing these waiting for a good price. They can be pricey if they are on sale at an antique mall/flea market) and the dried bouquet of flowers Josh had for me when he proposed [cue collective awwww]. 
  • {On top} are three classic novels, an iron trivet with a picture of us on top, and a wire gold leaf tree from... you guessed it... a flea market. Those suckers seem to be everywhere. 
  • {And leaning along the left side} is a cinnamon stick broom from Publix.

Moving on.

 I found this fantastic bed skirt at the Franklin Antique Mall. (Catching the pattern?) I usually only buy from flea markets because antique stores are so pricey, but I go there for ideas. This bed skirt was so unique and reasonably priced I just couldn't pass it up. Especially since we don't have one and I was tired of seeing that tacky box spring. 

Lovely.

Also in our bedroom the jewelry cabinet I made from a wooden Coke tray.


Maybe I'll do a step-by-step post later if anyone really wants to know... But basically it is a Coke tray with a picture frame hinged to it with screen door netting hot-glued to the inside of the frame and little cup hooks screwed in the top of the tray. I still want to put a drawer or something at the bottom for my rings. 

Well that's about all I've taken a picture of so far. There are still lots of pictures to be hung, projects to complete, and stuff to settle. 

So stay tuned,
Haley


Tuesday, June 28, 2011

Inspired Today

As I sit in front of a computer 5 hours a day, I surf the blogosphere a lot. Here are some things I have found today that I love:

1.
I want to refine my sewing skills  make my mom teach me how to sew so I can make this skirt  from Elle Apparel


2.
I want a Cricut or Silhouette so I can make vinyl cutouts and make things like Desiree from The 36th Avenue. Such as this table...


3.


4.
Here is another thing to add to the "When I can sew" category, subcategory "When I have kids." And This patriotic get-up would be cute un-patriotic as well, with just some patterned fabric.


5.
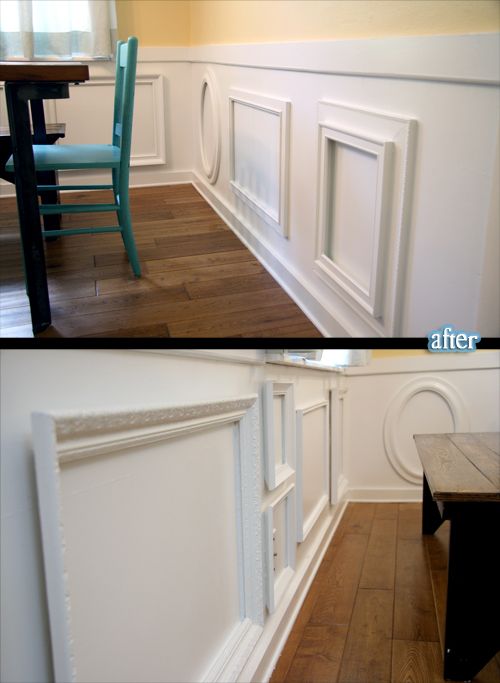
This is a neat, unique idea to spruce up your moulding from Lindsey at Better After


What number? Oh...
6.
I want a bunch of different but coordinating wooden dining room chairs like this to put around the table we make out of our old door...


7.
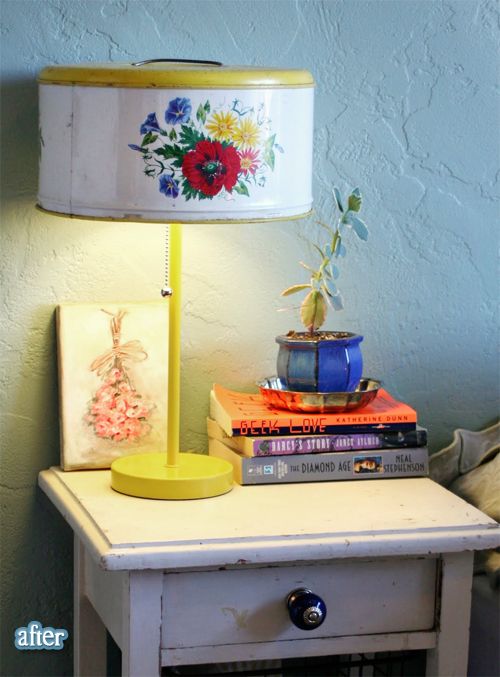
I have seen tin cake carriers at flea markets and loved them but didn't know what to do with them (other than have them sit around a look pretty) until now. Check out this lamp made from a tin cake carrier from lilliedale...


Stay tuned...
Haley

Monday, June 27, 2011

To-Do list

I feel like I have been caught in a whirlwind. I have been out of pocket all weekend, but I am (currently, though subject to change) excited about gearing up for the move. I want to get the house all cleaned up and start packing. I feel like we should get it cleaned/organized before we pack it up. This may seem illogical, but that way I will know where everything is so I can pack it in a more organized fashion.

Each time I've moved (which has been all-too-frequent in the last 4 years), I like to pack like-things together and label the box of EVERYTHING that is in it. I want to know where everything is when I start to unpack.

We also want to snap a few pics of our current house since it is our first home together. We have a few pics from Christmas and when I made a project, but I want to be able to remember our first place. (And I want to show you our before and afters)

So this is our to-do list:
Clean up
Take pictures of our house now
Ensue packing
Weed out all our clothes and junk we are going to sell
Continue packing
Gather all our yard sale item in one corner
Put prices on everything
Plan a going away party
Continue packing
Make signs and post online about yard sale
Have said yard sale and going-away party
Count our stash made from the yard sale (yeah right)
Whatever we don't sell, give to Goodwill
Go home for mom and dad-in-law's birthdays (conveniently on the same day)
Fix all the holes we put in the walls so we can get our deposit back
Deep clean the apartments so we can get our deposit back
Pack the last bit before the move
HARRY POTTER midnight premier
Peace out

(You can see my priorities are in all caps.)

We (...I) have lots of projects planned for the new place. I'm sure Josh is going to love this DIY phase I am in right now. I want to turn the door we picked at a flea market into the dining room table. This is our Number One project, so we can have a space to work on as well as eat (since we are selling the big chunky desk Josh has). I want to make one bench seat for the table and the rest will be chairs, maybe mismatched flea market chairs, maybe new.

Stay tuned for updates...
Haley

Friday, June 24, 2011

Plans are taking shape

Alright, so here it goes. We have, as of yesterday, applied for an apartment in Nashville and are moving July 14th.

As in, three weeks from now?   YEP!

It is hard to believe that this is actually happening. We are having a yard sale in two weeks to get rid of all our old hand-me-down stuff we no longer want (keeping basically the beds, antique chairs, new rug and lamps, and kitchen stuff). New city, new life, new style = new furniture (or thrifted, but new to us). This makes Haley a very happy wife.

I have been scowering the blogosphere for ideas and inspiration. There are some amazing DIYers out there who are so gracious to share their awesome ideas. Maybe I can be one, too? There will be much DIYing and renovating in my futer (which also makes me very happy). We are stipiing out "stuff" down to the bones and simplifying our life while simutaneously creating the life and lifestyle we have been putting off. Its funny how "stuff" can weigh you down from accomplishing the things you want to do.

Maybe I will post some pics of our current apartment in all its "before the purge" glory.